My golden birthday quilt: Single Girl, a.k.a. 24

 I've titled this quilt, my own version of Denyse Schmidt's design, 24, after the year of my life when I created it.
Since first discovering Denyse Schmidt's stunning modern quilts, which may have even been before I even got into quilting, I loved her "Single Girl" design. It is a modern, witty interpretation of the traditional Double Wedding Ring quilt pattern. Then I accidentally became addicted to making quilts after finishing this one for Ben as a Christmas present in 2009. I was in Whipstitch last fall and learned that Diana, one of the shop girls and a talented and inspired lady herself, would be teaching the Single Girl (Quilt) Support Group, a four-month-long course where I could tackle the scary new skill of quilting and sewing curves. (If you sew, you might understand my fear.)
I'm not single, and neither were about half of us in the group, who then began meeting, once a month, in September, October, November, and December of 2011. We were all just excited about this quilt! This was my first formal quilt class, and it was so fun to see my classmates' ideas for color and design, especially since we all had such different ideas for where we wanted to take our fabric charges. A couple people decided to make the full-size quilt, which requires 12 full circles; a couple of us decided to drive ourselves insane and make a queen-size quilt for our beds, which is 16 full circles.
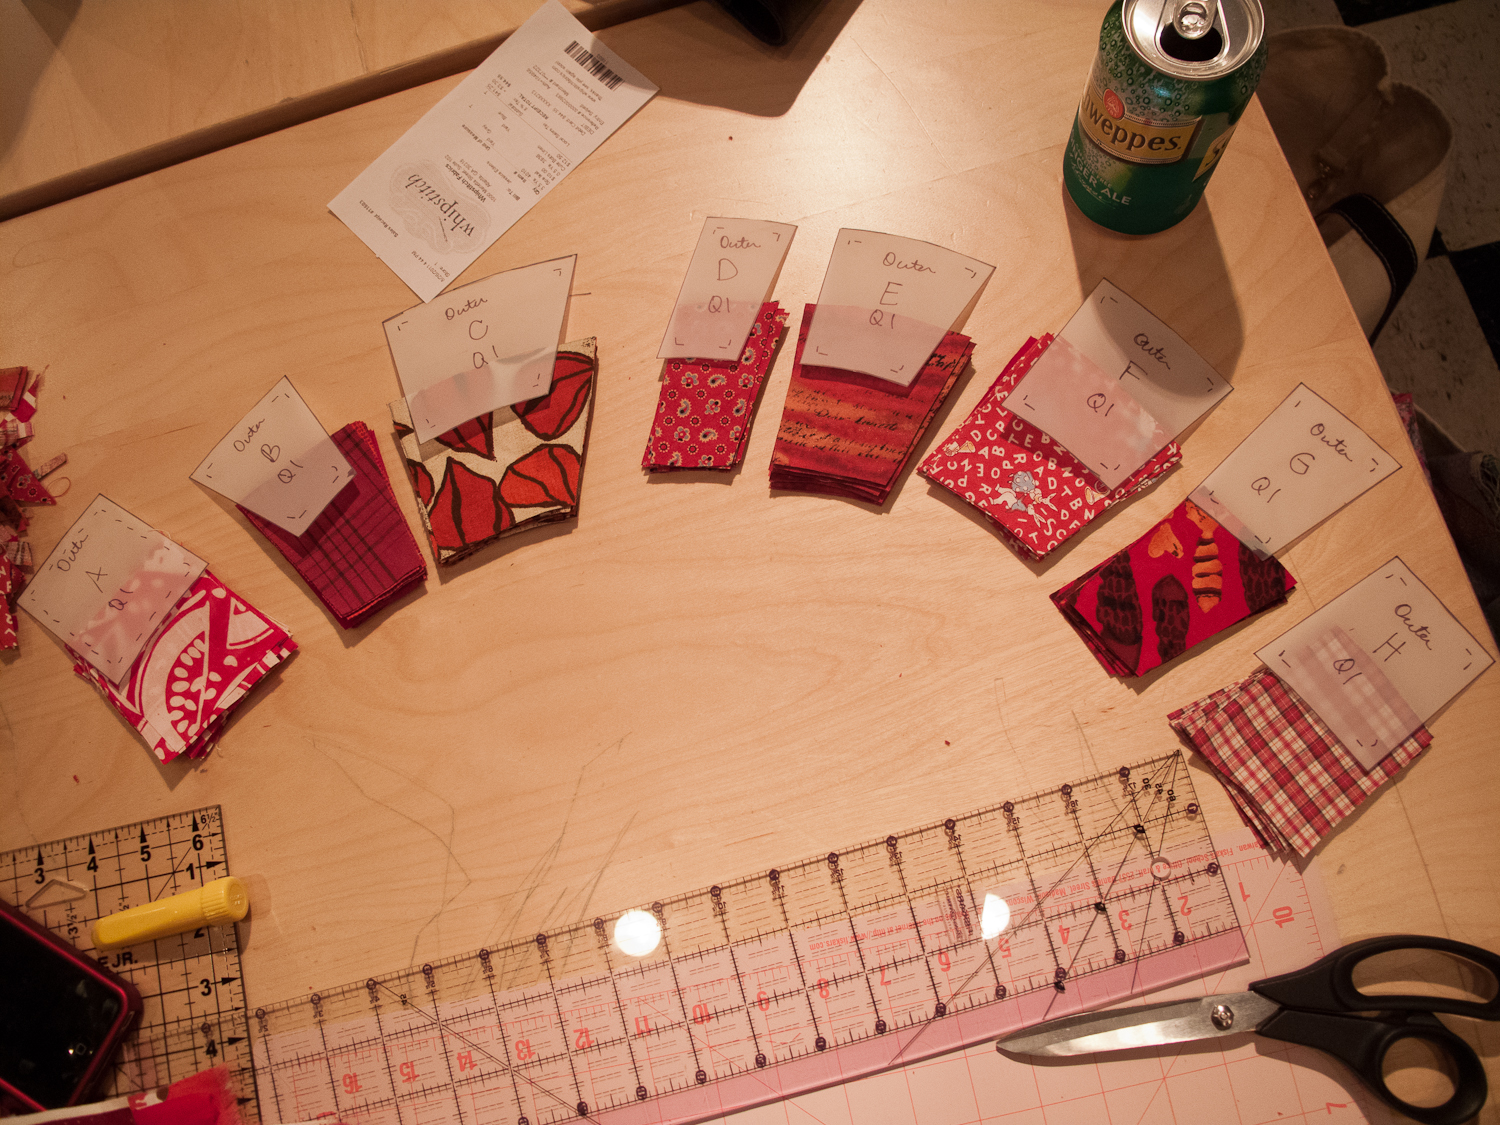
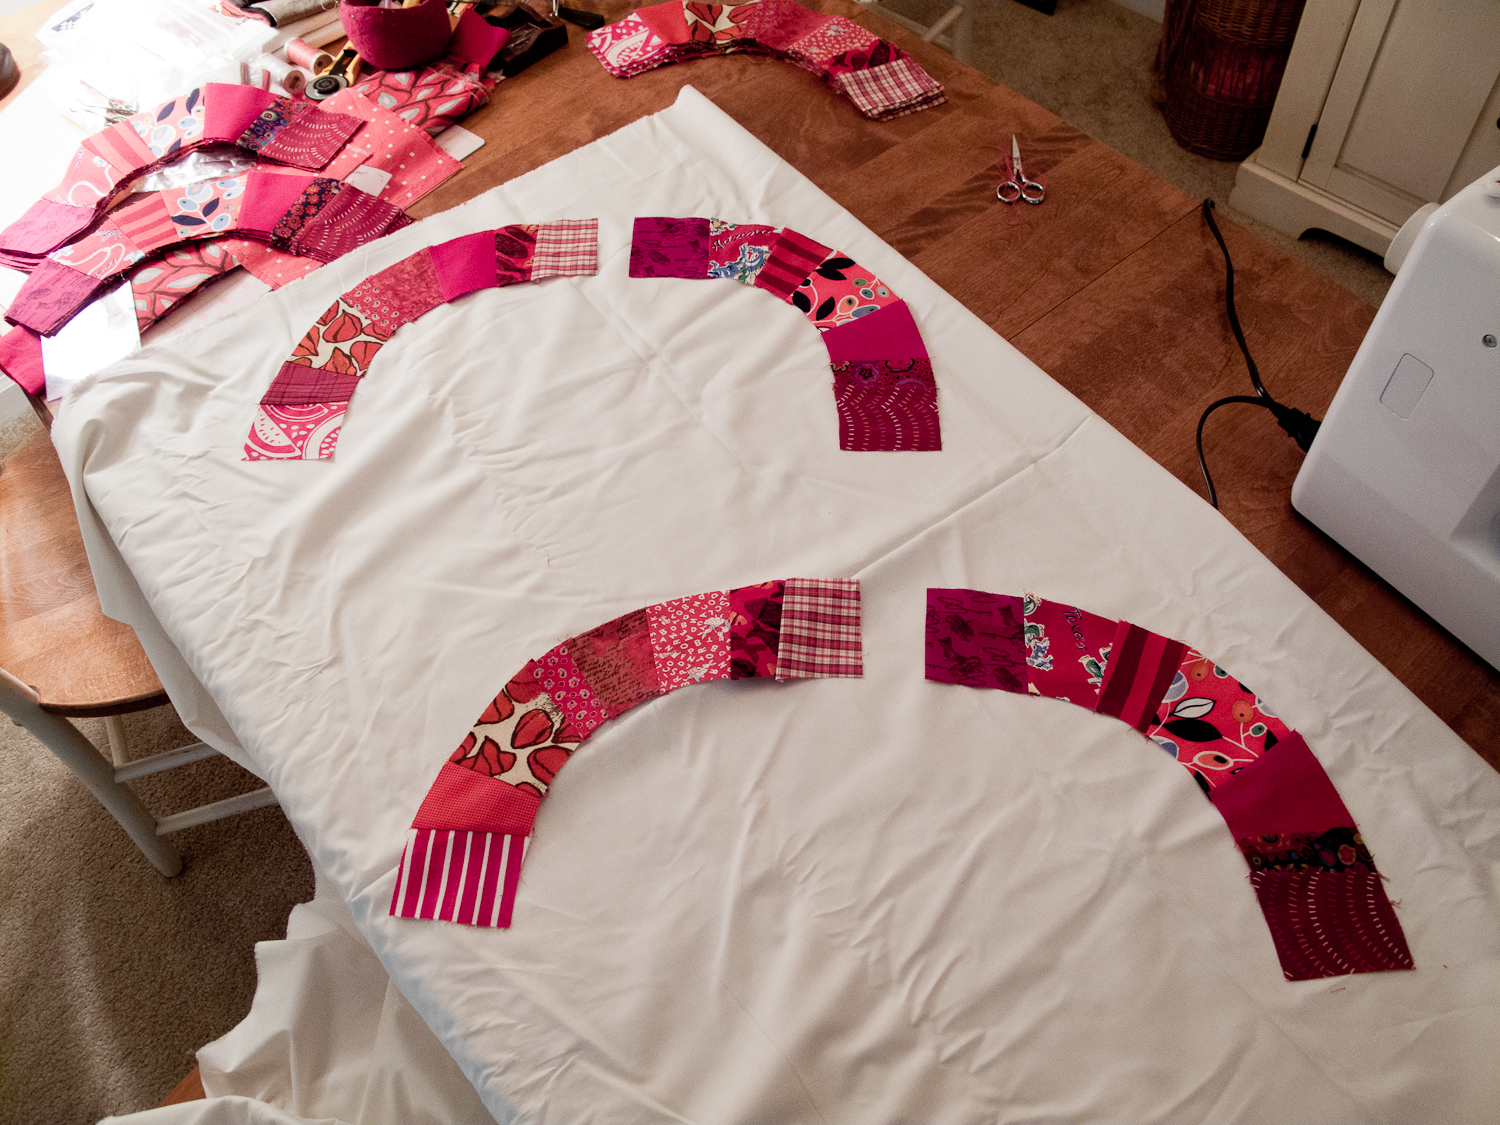
At our quilt class, cutting and cutting and cutting pieces for days:
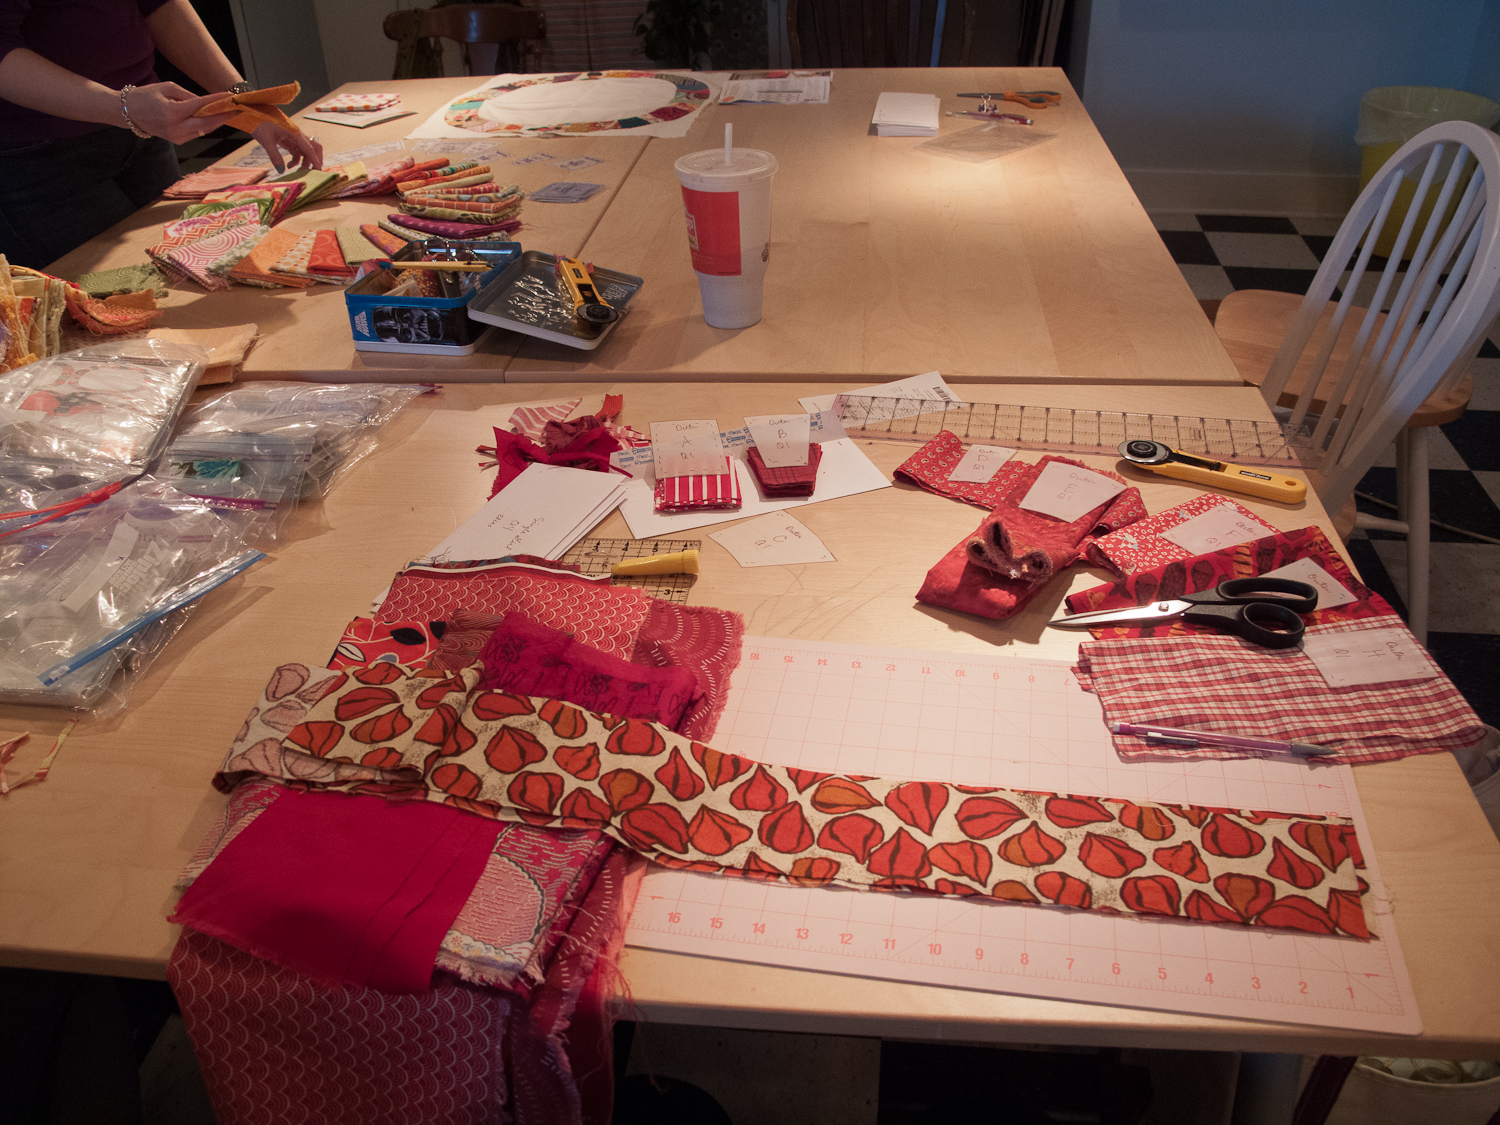
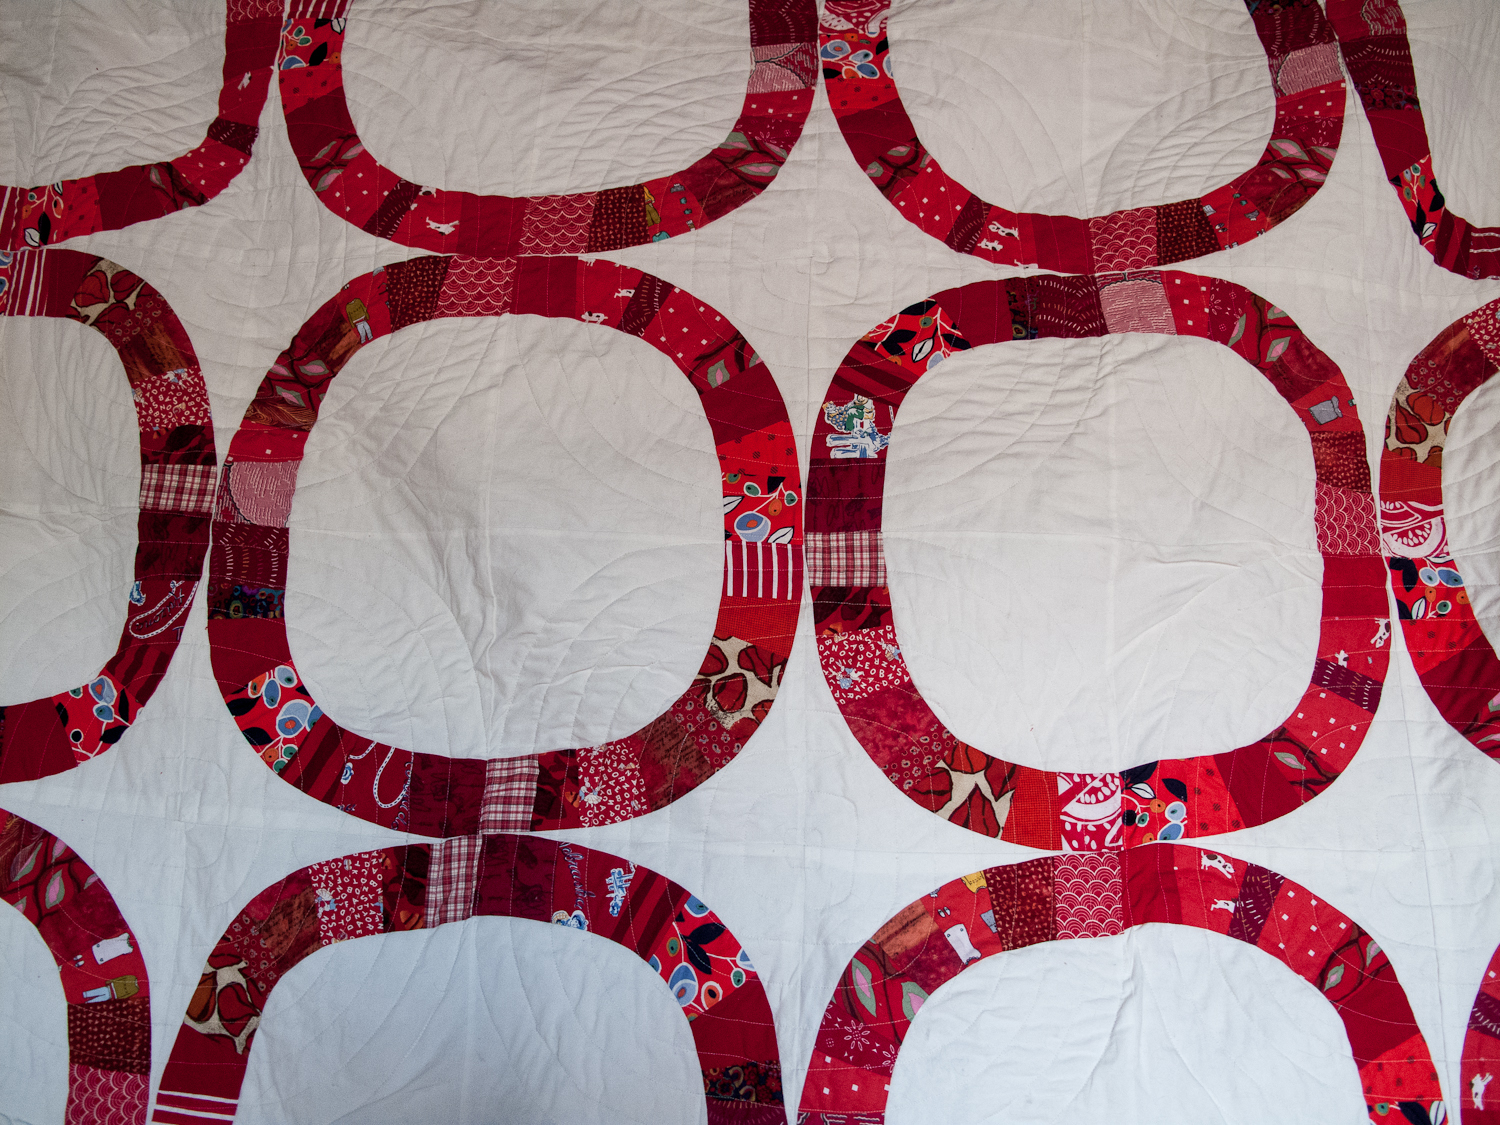
The way the quilt is designed, there are four traditional quilt "squares" that make up one full circle, so you make sixteen Quadrant 1 squares, sixteen Quadrant 2, and so on, until you have 64 squares. Then you sew them all into full circles, and the magic part is when you lay them all out and turn them different directions so that all your Quadrant 1s are not all in the upper left corner of each circle. This is how you get that wonderful movement throughout the whole quilt, and what makes the circles look a little oblong and uneven all over. That is, in other words, one of the most charming elements of the repeat pattern, and what makes this quilt more interesting than you might assume.
Click to see the rest of the process.
Keeping the pieces in order--each is a slightly different shape--for Quadrant 1.
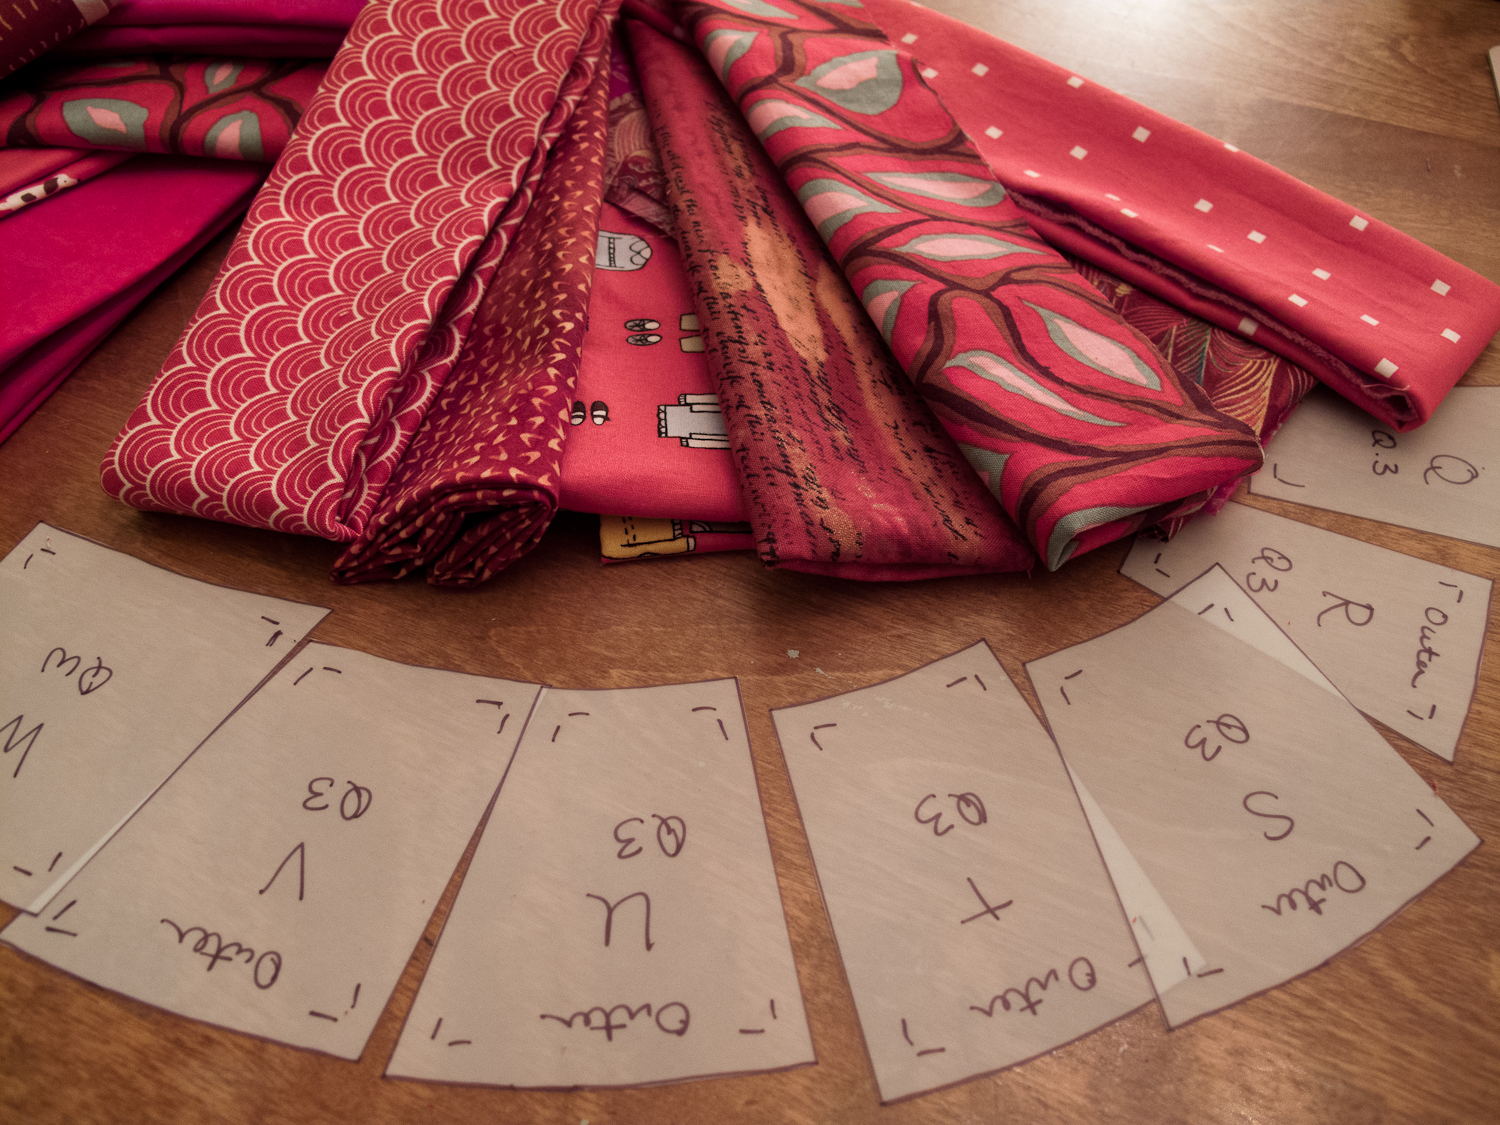
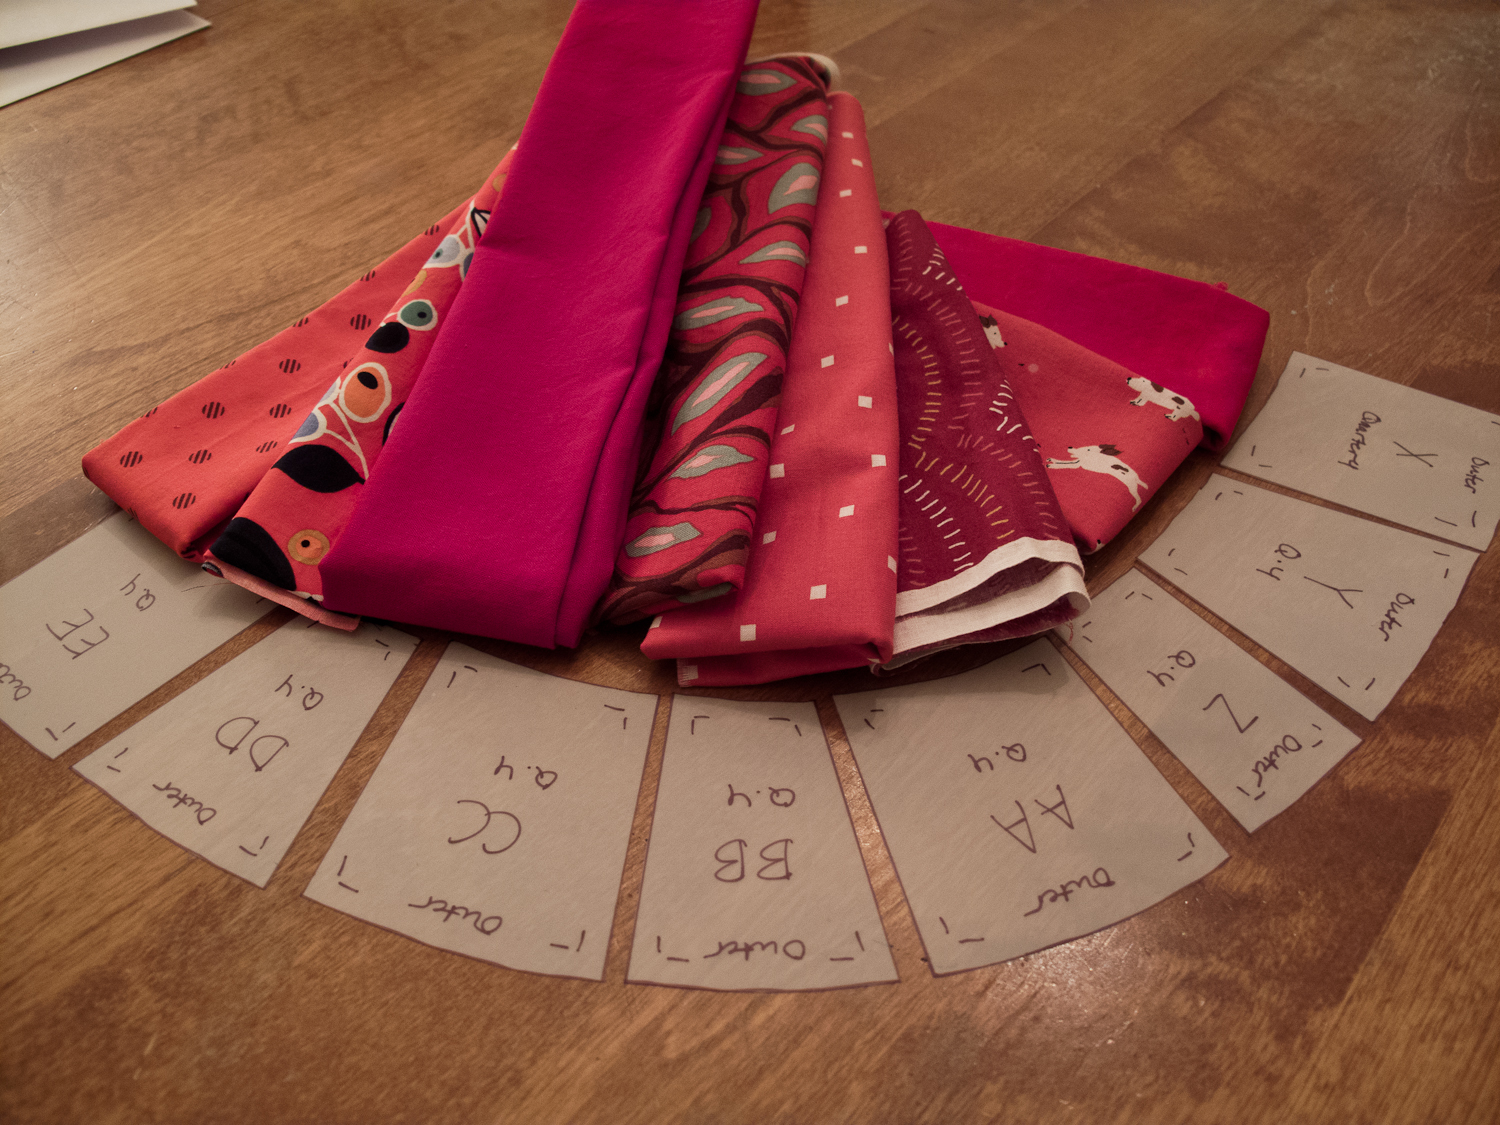
Sampling the entire four-quadrant arrangement before I start hacking away at my lovely red fabrics
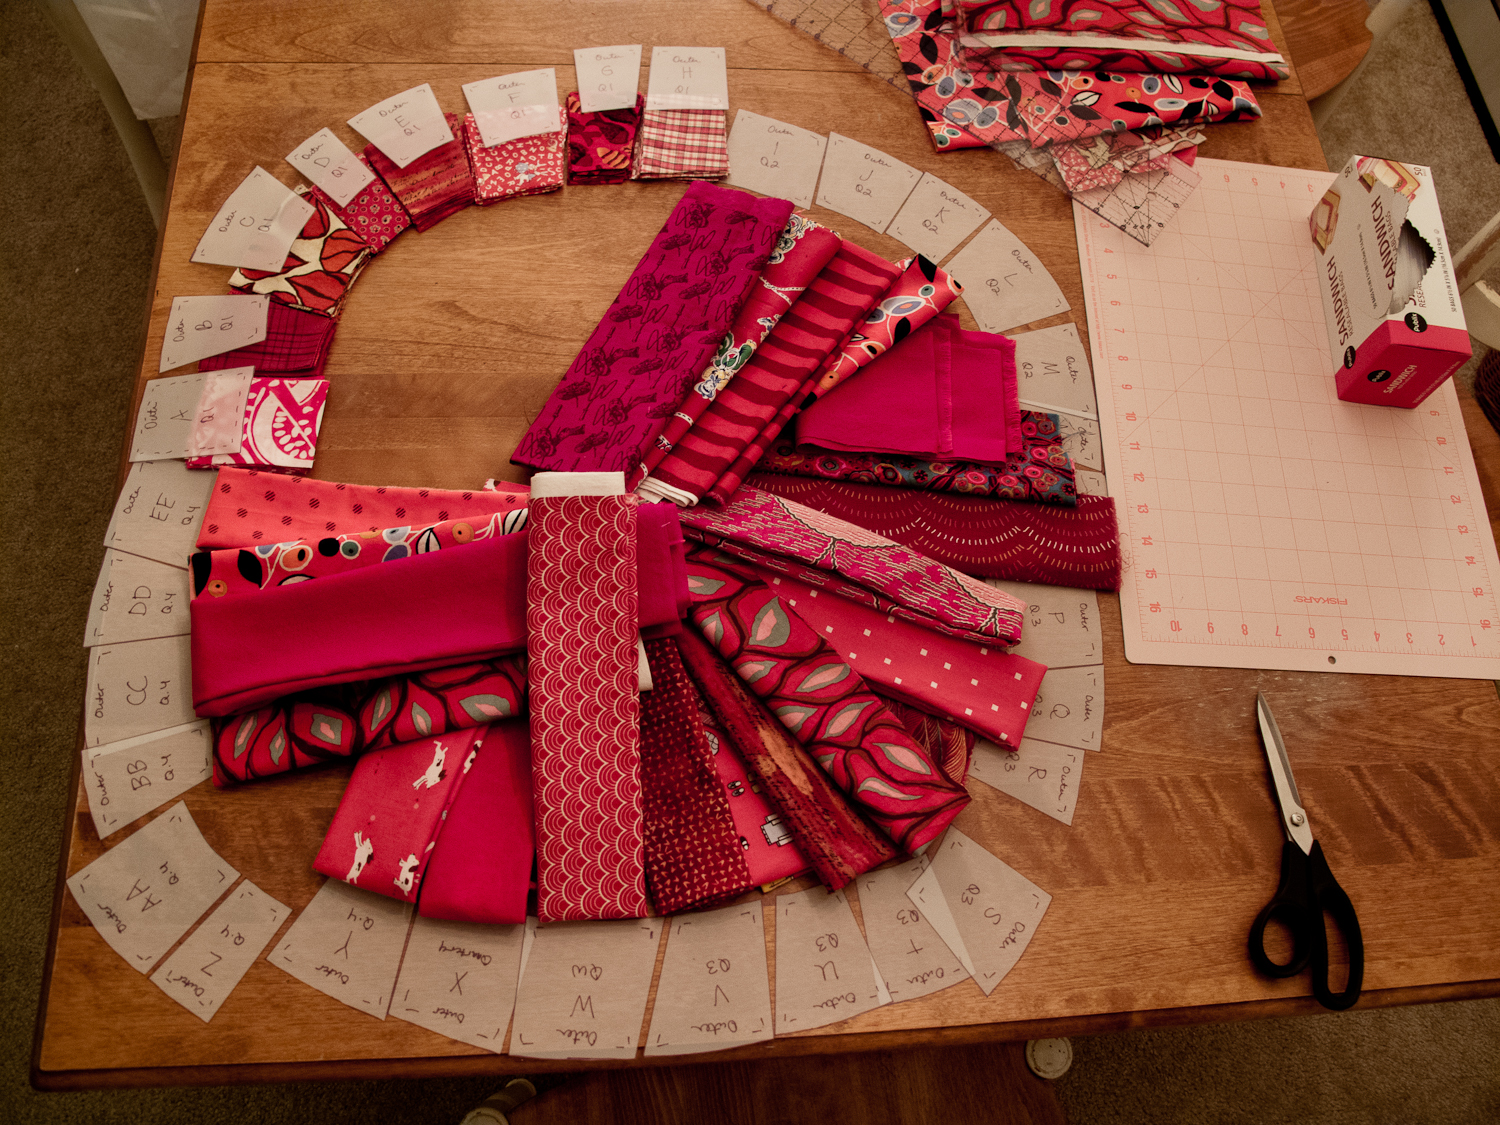
My classmates all had wonderful pattern and design schemes for their quilt: grey background with yellow, blue, and pink fabrics in the circles; navy blue background with greens and yellows; white or light background with scraps of some favorite fabrics, making kind of scrap-busting sampler circles. I only had one image in mind for my Single Girl: two colors, Kona Snow, and and the many scraps and fat quarters and bits of red fabrics I had collected over a few years but had never been able to use in any major project. I adored my red fabrics collection, but found they were always too much in other projects I was working on, and so they sat waiting for that next project when maybe they would find a home. I had also seen this simple version of the quilt and loved it, so I was reassured that a two-tone version of this quirky circular design would look spectacular.
We finished the class last December, right when I had foot surgery, and I was able to get all the circles sewn together to finish the quilt face by the end of 2011. But the next step was daunting: the quilting together of all the layers: face, batting, and backing fabric. I didn't want to invest quite yet, nor did I have any idea what I wanted to use, as the backing of this quilt. This project was for me, and it wasn't just going to be a throw-size; it was going to be big enough to use on my bed, and so I wanted to make sure that I didn't scrimp or cheat on anything, and that I didn't make any major mistakes by picking something cheap and easy for the backing or the quilt design.
Finishing the quarter-circle pieces

Checking out the first two quadrant shapes against the Kona Snow background color
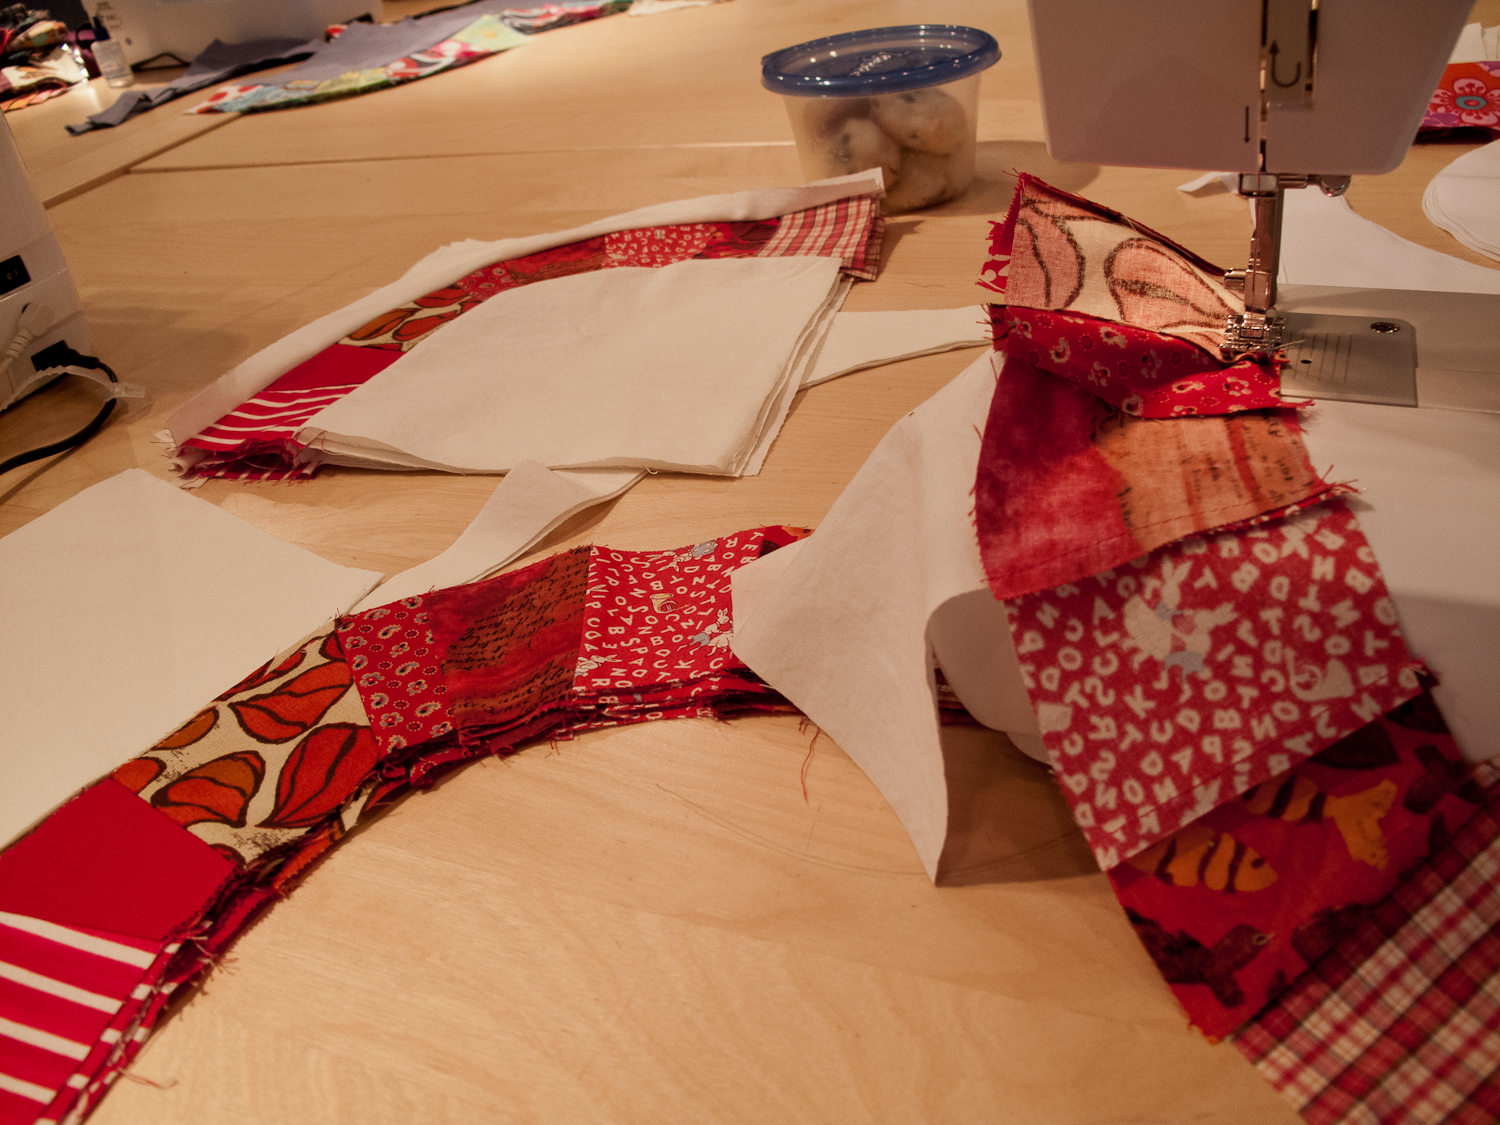
Tackling, and mastering, sewing circles. It's so exhilarating when you take it off the machine and press it and -- you've made sewn something into a circle!
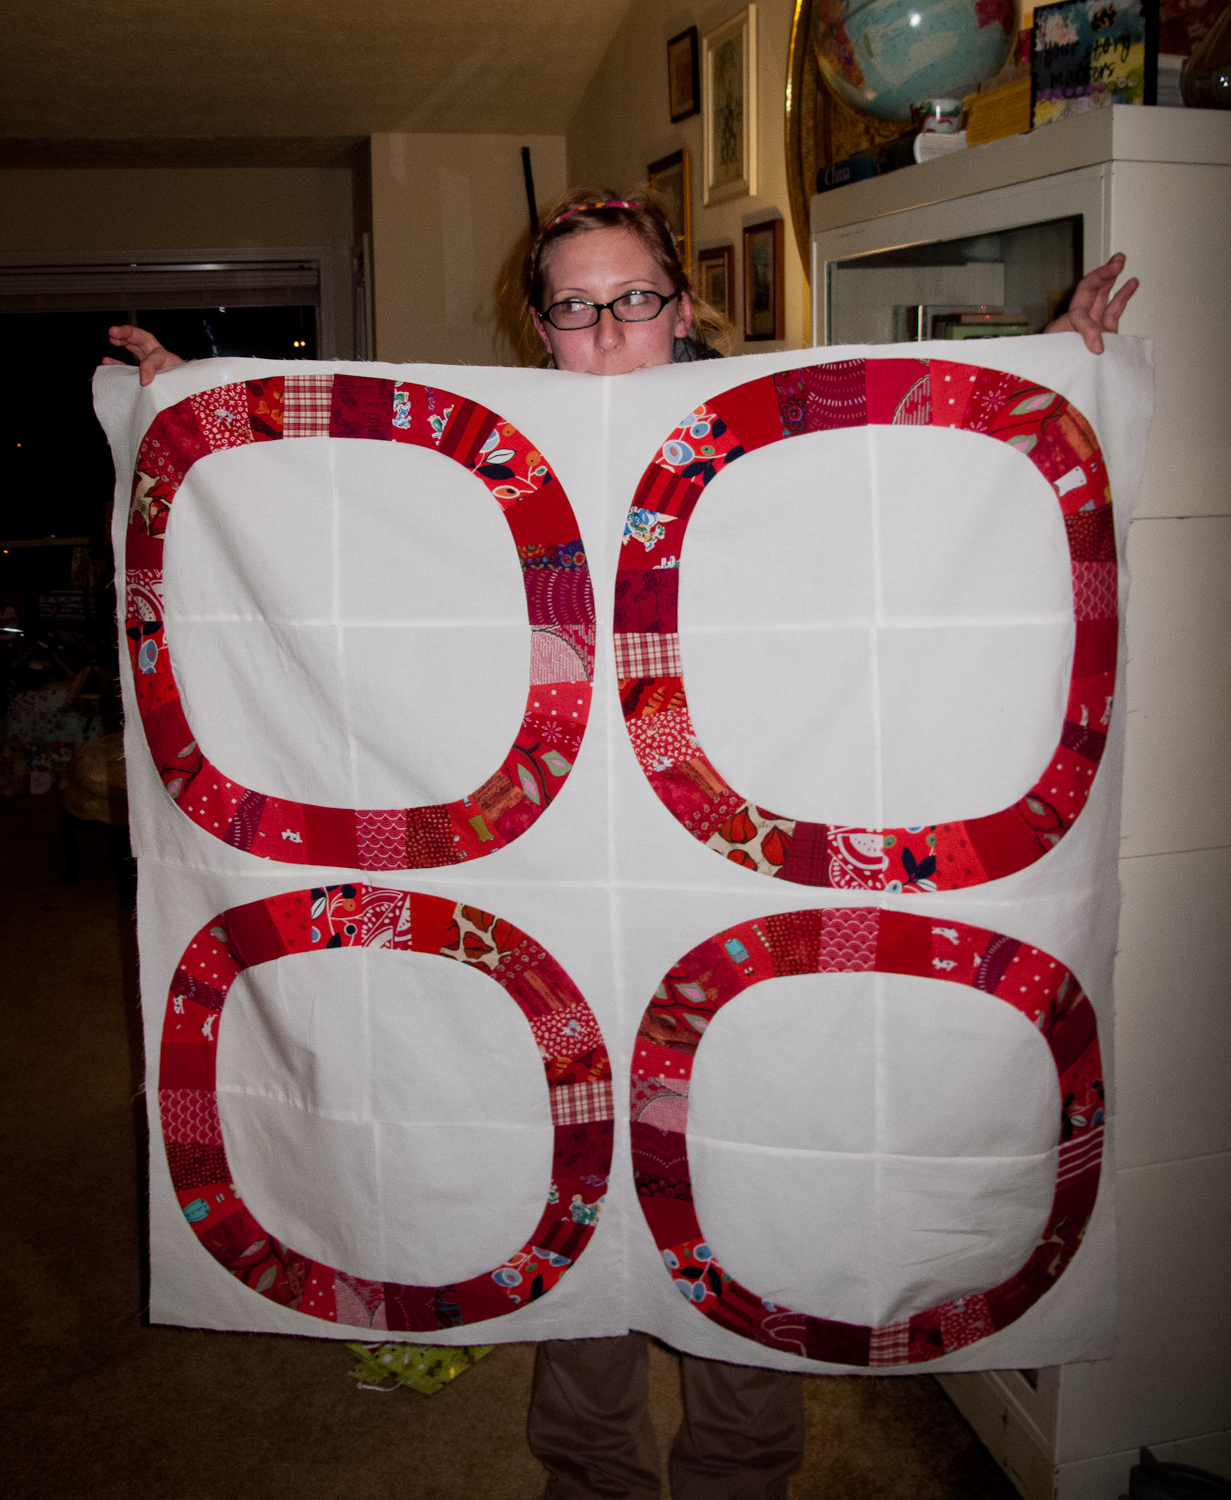
Four finished circles sewn together, which is the baby-size version of this quilt. I could have been done right there!
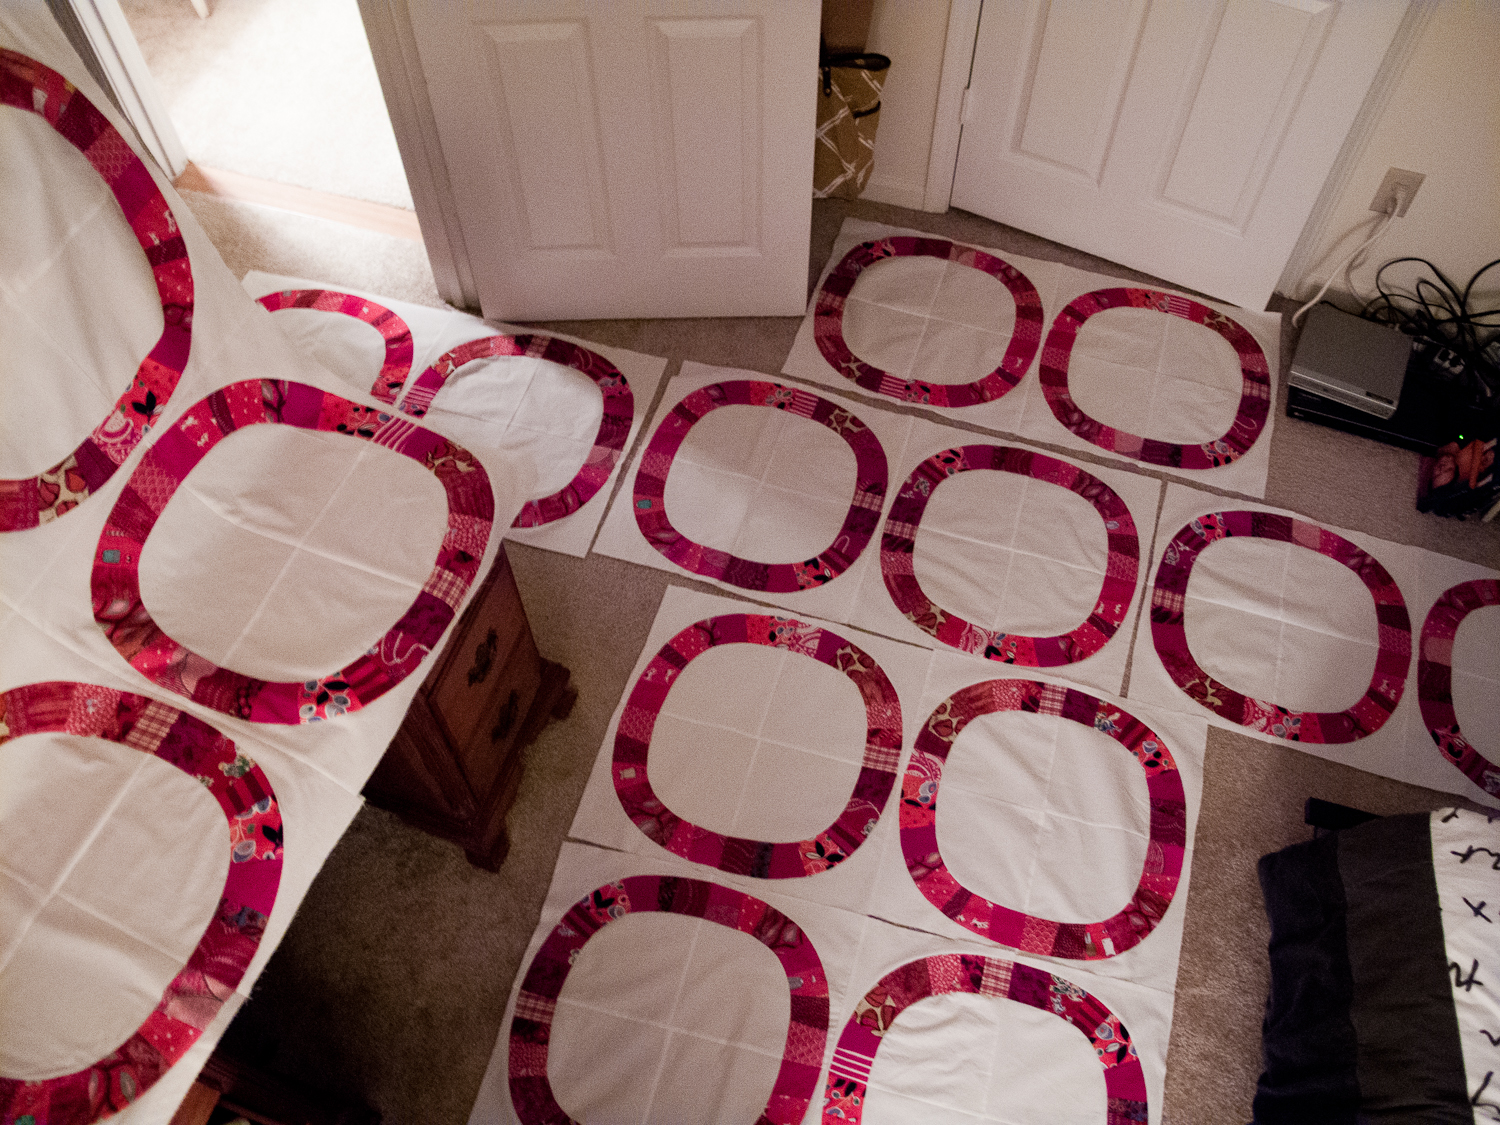
So many circles!
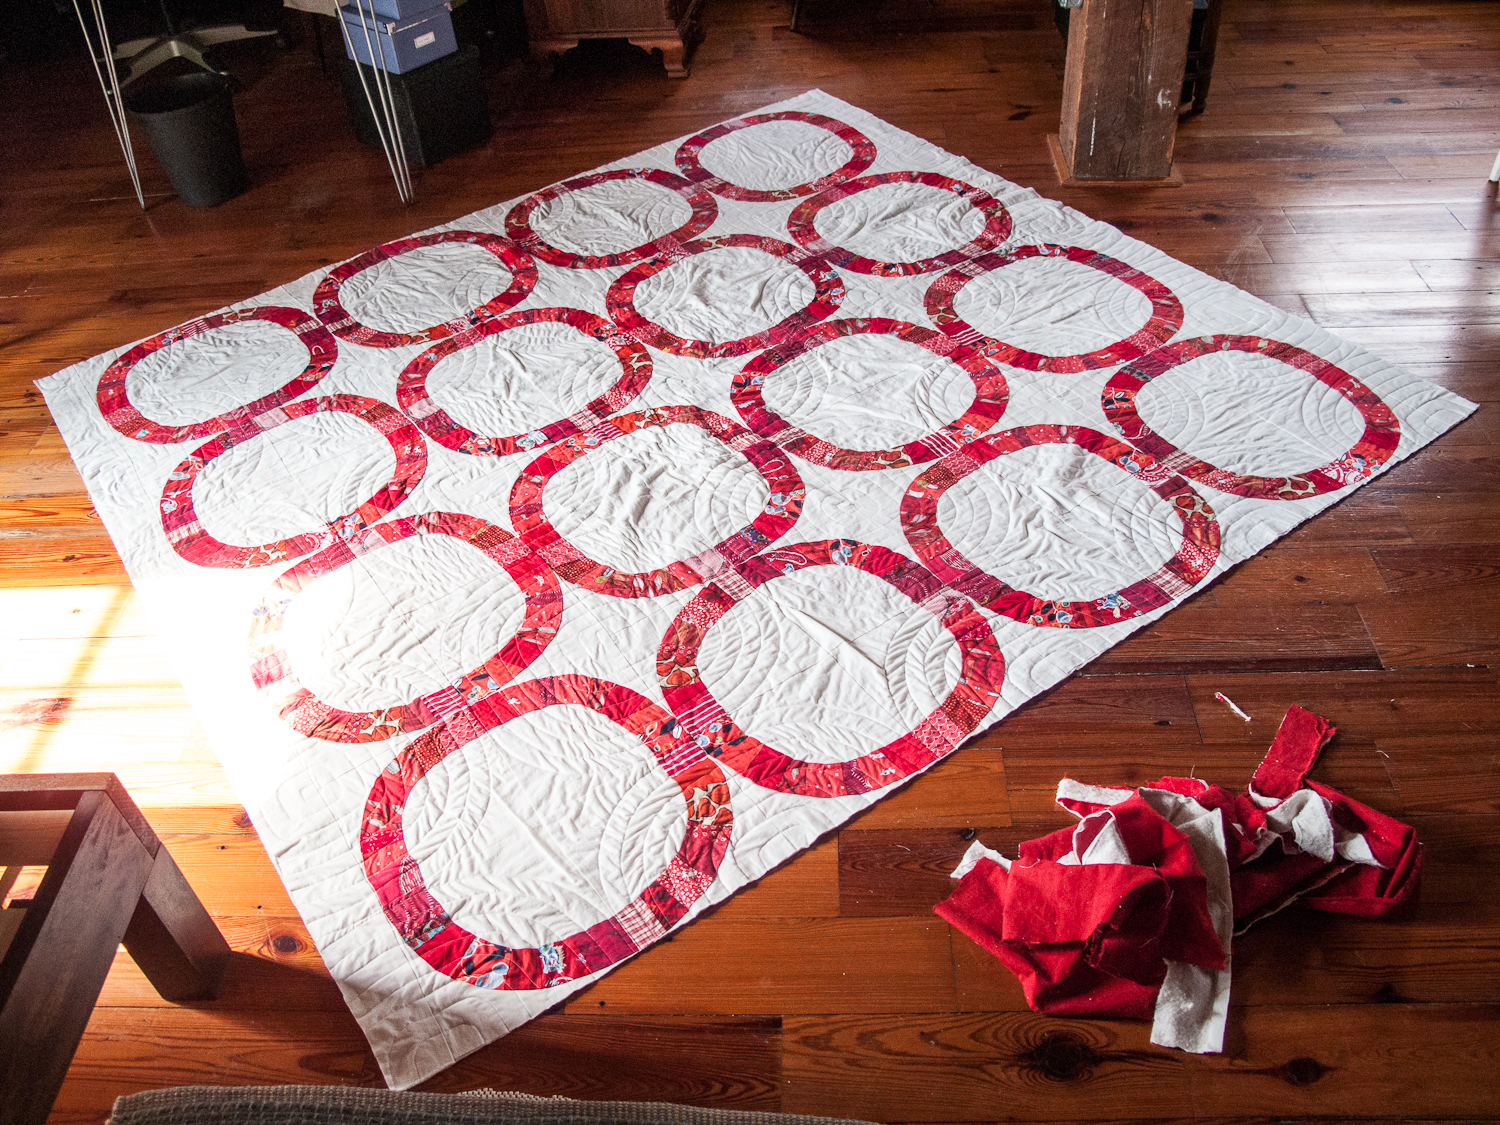
I actually did make one screw-up with sewing all these together. It was really annoying. The pattern called for a 1/2 inch seam allowance, but I was so excited to put these together, I never even thought to check the pattern and sewed them all at 1/4 inch seam allowances. Not the end of the world if I had decided not to go back and change them (the picture below is which the smaller seam allowance), however, what I loved about these circles is that they all butt up against each other. And with that extra 1/4 inch between each one, they were definitely NOT touching. So, I went back and added that extra 1/4 inch between every single one. I was annoyed and yes it took a long time and yes I cheated as much as I could. I'm very glad I adjusted it in the end. I also added the recommended few inches of sashing to the top and bottom "sides."

I folded it up and five months passed, during which I earned my master's degree (wooo!) and had little time for sewing. In May, I decided on a solid red for the backing, which would be the most economical option since I needed to buy 8 yards of whatever I chose. I hovered between Kona Tomato (more orange-based) and Kona Chinese Red. The final product is mostly Chinese Red with a stripe of Tomato down one side: perfectly random and charming.
Since I started this quilt on the day after I turned 24, which was also my golden birthday (24 on September 24th), I made it a personal goal to have this quilt on my bed before my next birthday, in September 2012. My original plan was to use this quilt to learn and practice on a long-arm quilting machine, which you can rent by the hour at Red Hen Fabrics in Marietta, Ga. But I didn't ever have the time or money investment to put into taking the training, nor did I know when I would be able to. In the meantime, September was fast approaching and an online quilt class I took (again from Whipstitch) helped in getting me excited about machine quilting on my own sewing machine at home. I had initially avoided any plan to quilt this Single Girl creation on my own machine because, as anyone who has ever machine sewn a quilt knows, quilts are big and thick and unruly, and machines are small and the fabric and needle must dance a delicate dance, lead by the very alert and intentional supervision of the person at the helm. It terrified my to imagine quilting on my own machine.
There was a lot of this going on. Large quilt, small machine, cat wanting to help out and hang out.

I should mention that I had flirted earlier with the idea of using straight line quilting on this project, after some seeing some lovely versions by other bloggers online, because I just wanted to finish the dang thing. The circular quilting lines pattern that comes with Denyse Schmidt's pattern and instructions is beautiful, but I dreaded the hours I would spend tracing hundreds of circles smaller, and then larger and larger, around and around each other, all over the face of my quilt. Having hardwood floors was essential in this step, although is did hurt my knees a lot. I took a week and many breaks, but persevered and got all those dang circle lines on there.
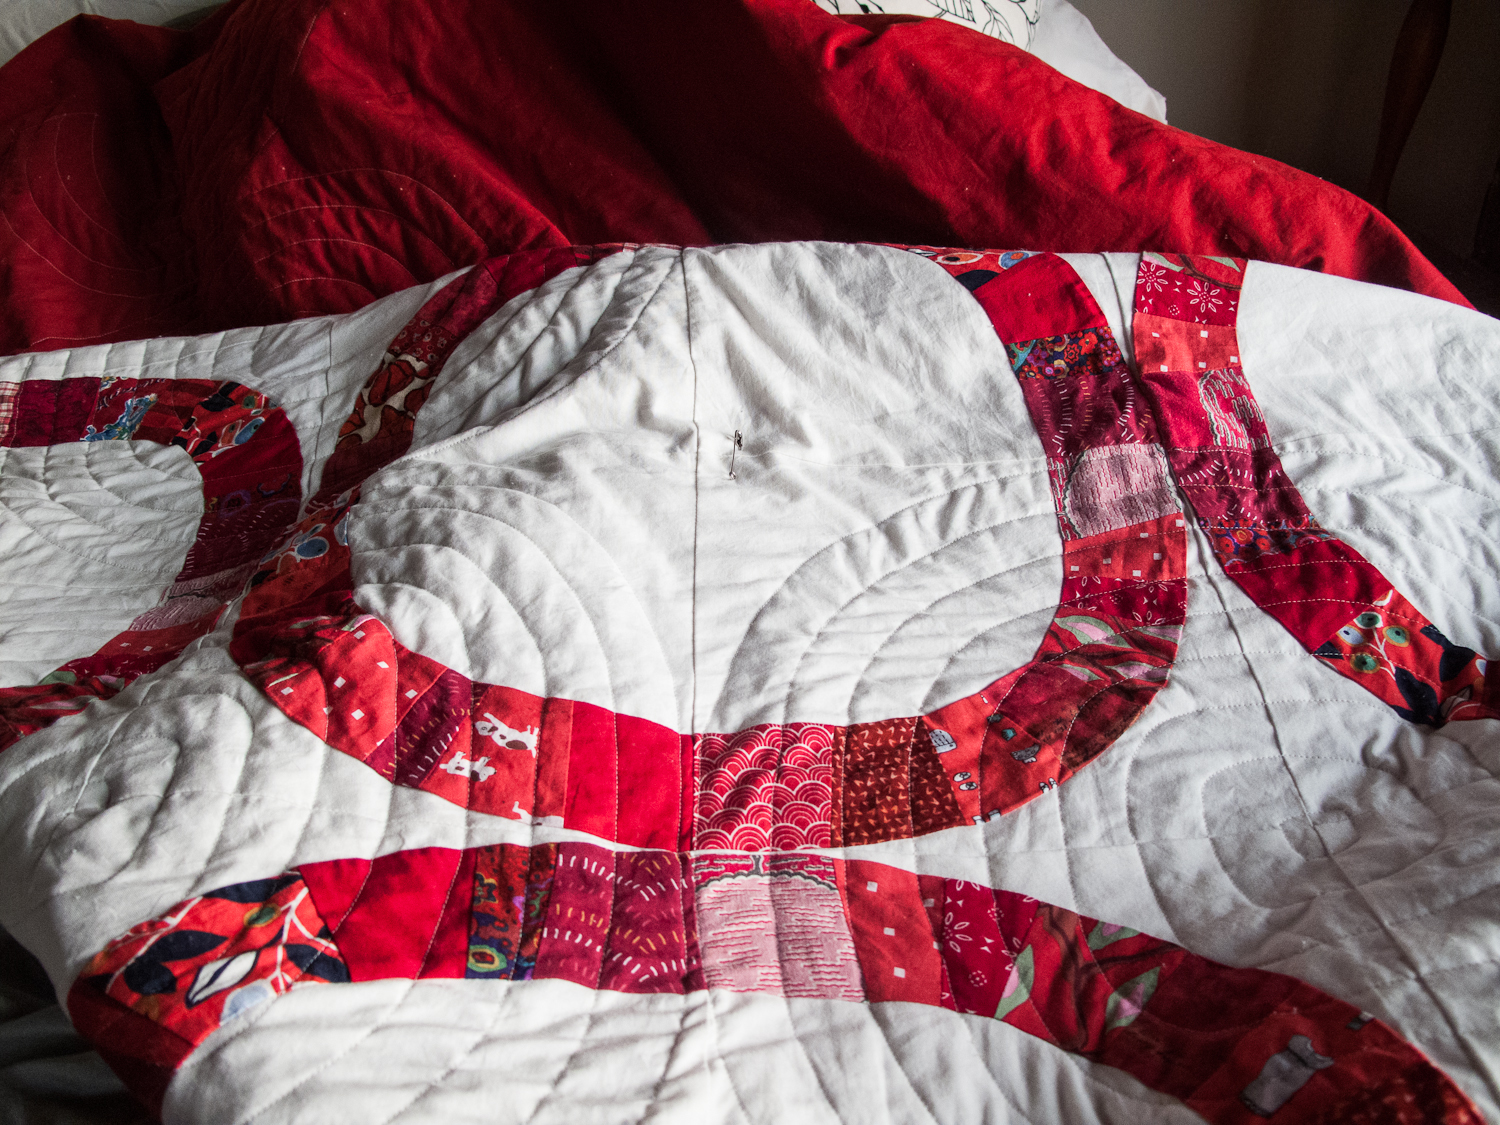
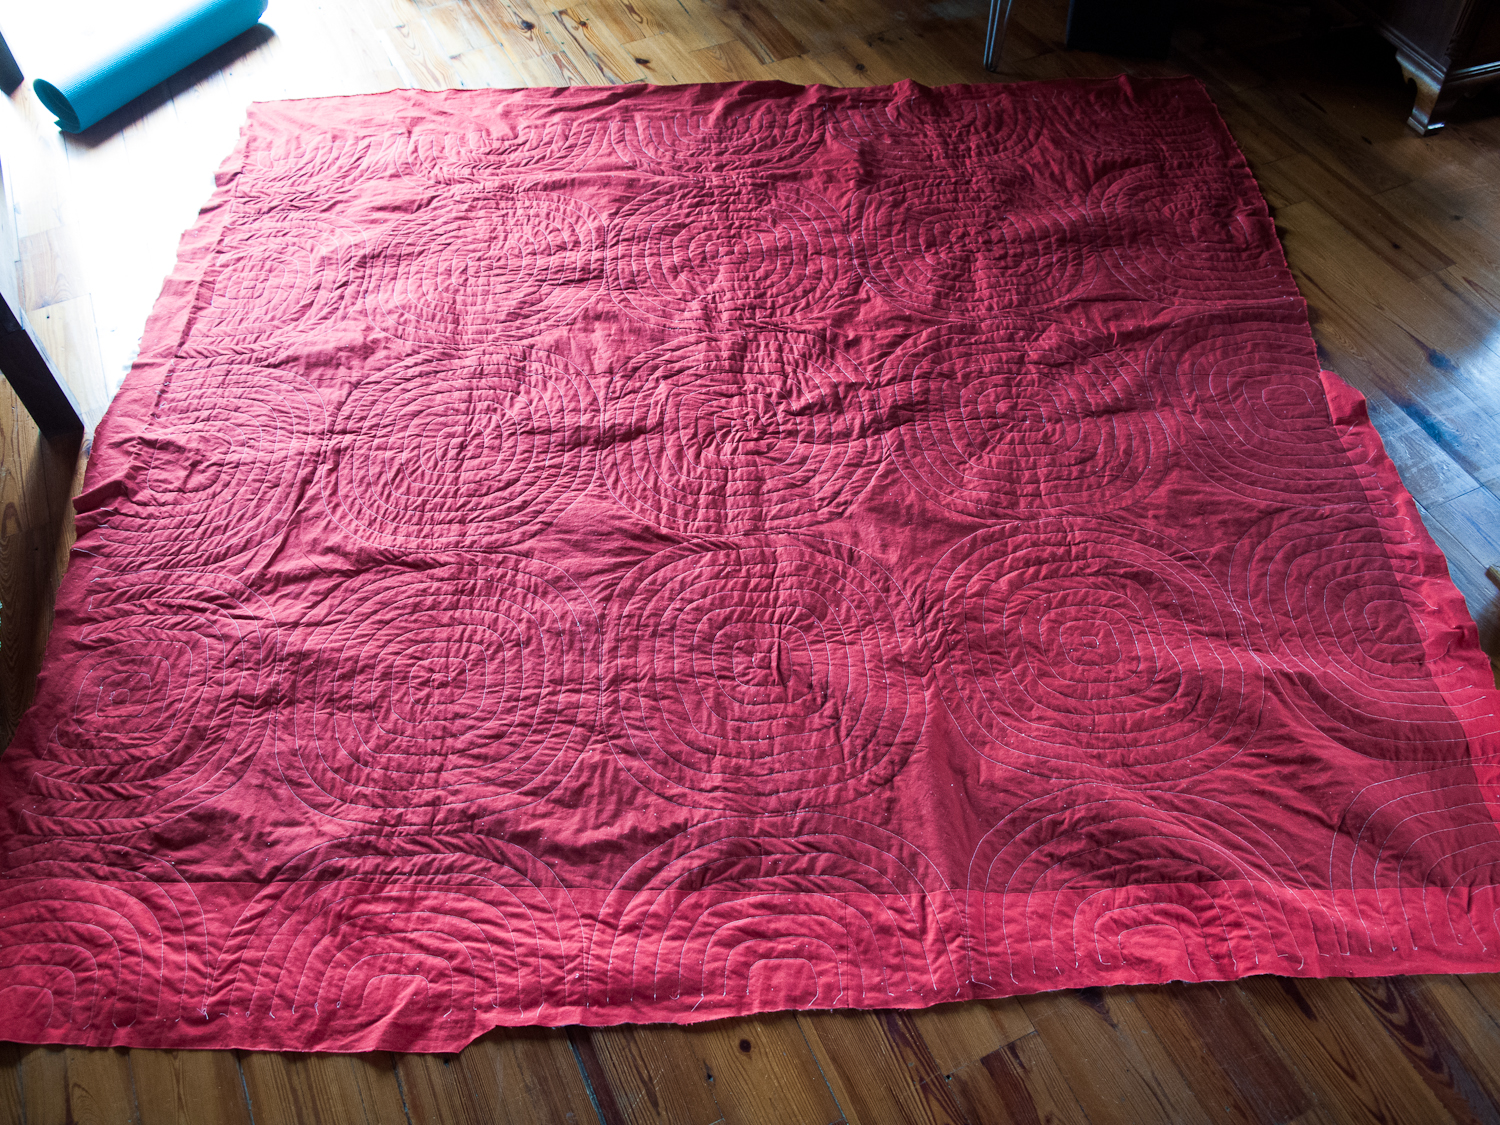
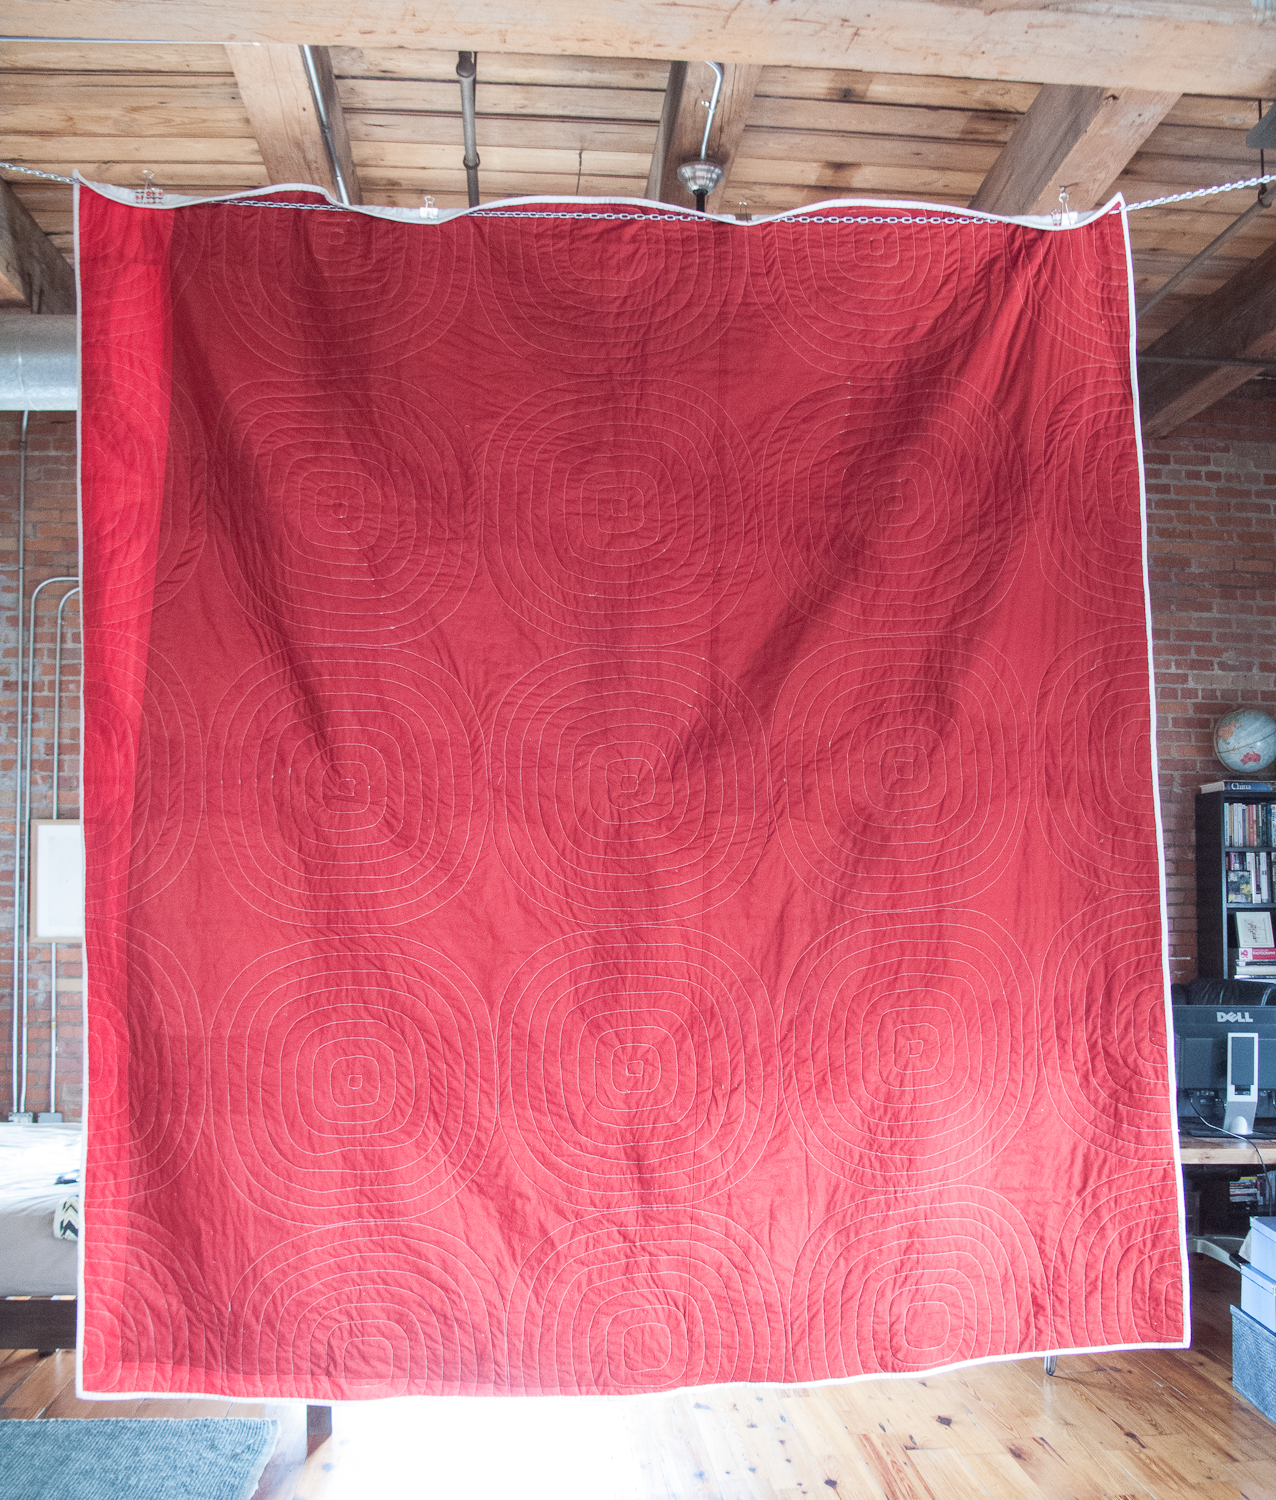
Full credit goes to my Mom for persuading me not to use straight line quilting back when I really wanted to, because the circular quilt lines are what made this quilt spectacular. As I was finishing the circles (which took for.ev.er) I couldn't believe how this quilt was coming alive, even after I thought I already adored it. I had no idea. Here was where it earned its character, with diamonds forming in the negative space where four quilted circles met. I used the same color thread that I always use with Kona Snow, Gutterman 795, which vanishes into the fabric and just creates the most amazing texture. I didn't want the stitches themselves to be the star--I wanted the motion and texture of the fabric between those quilt lines. The back, in Chinese Red, shows more obviously the cream quilting lines.
Check out that movement with those circular quilt lines! Mmmmmmm!
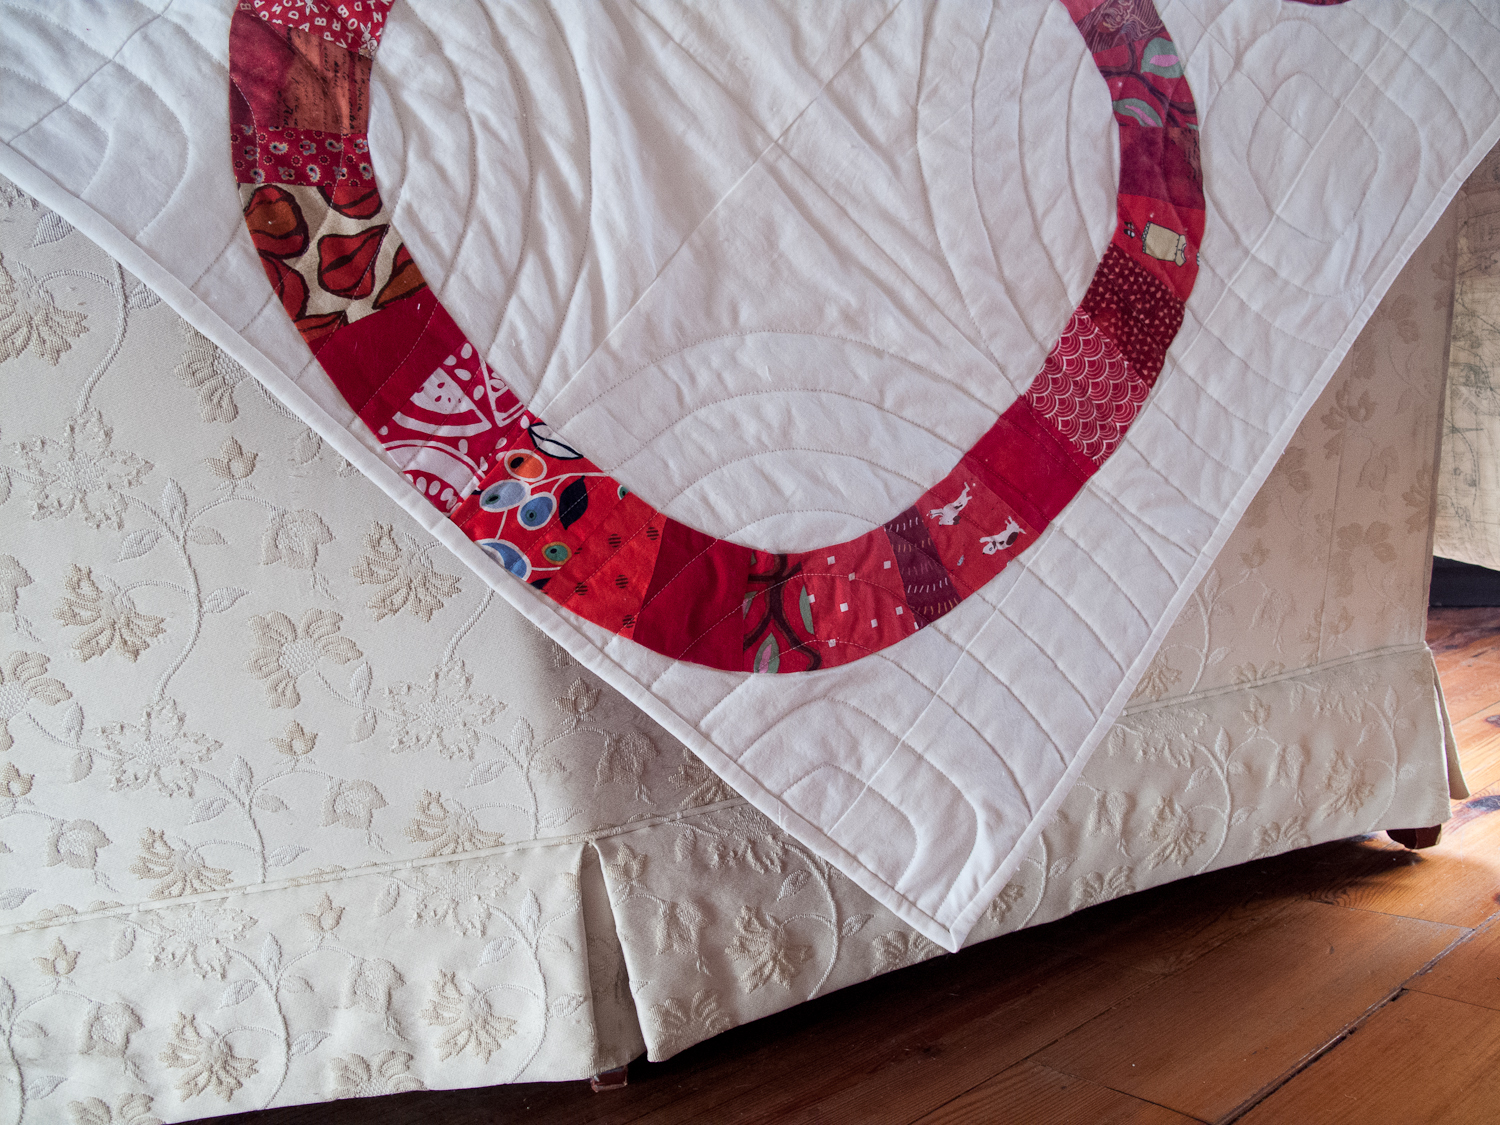
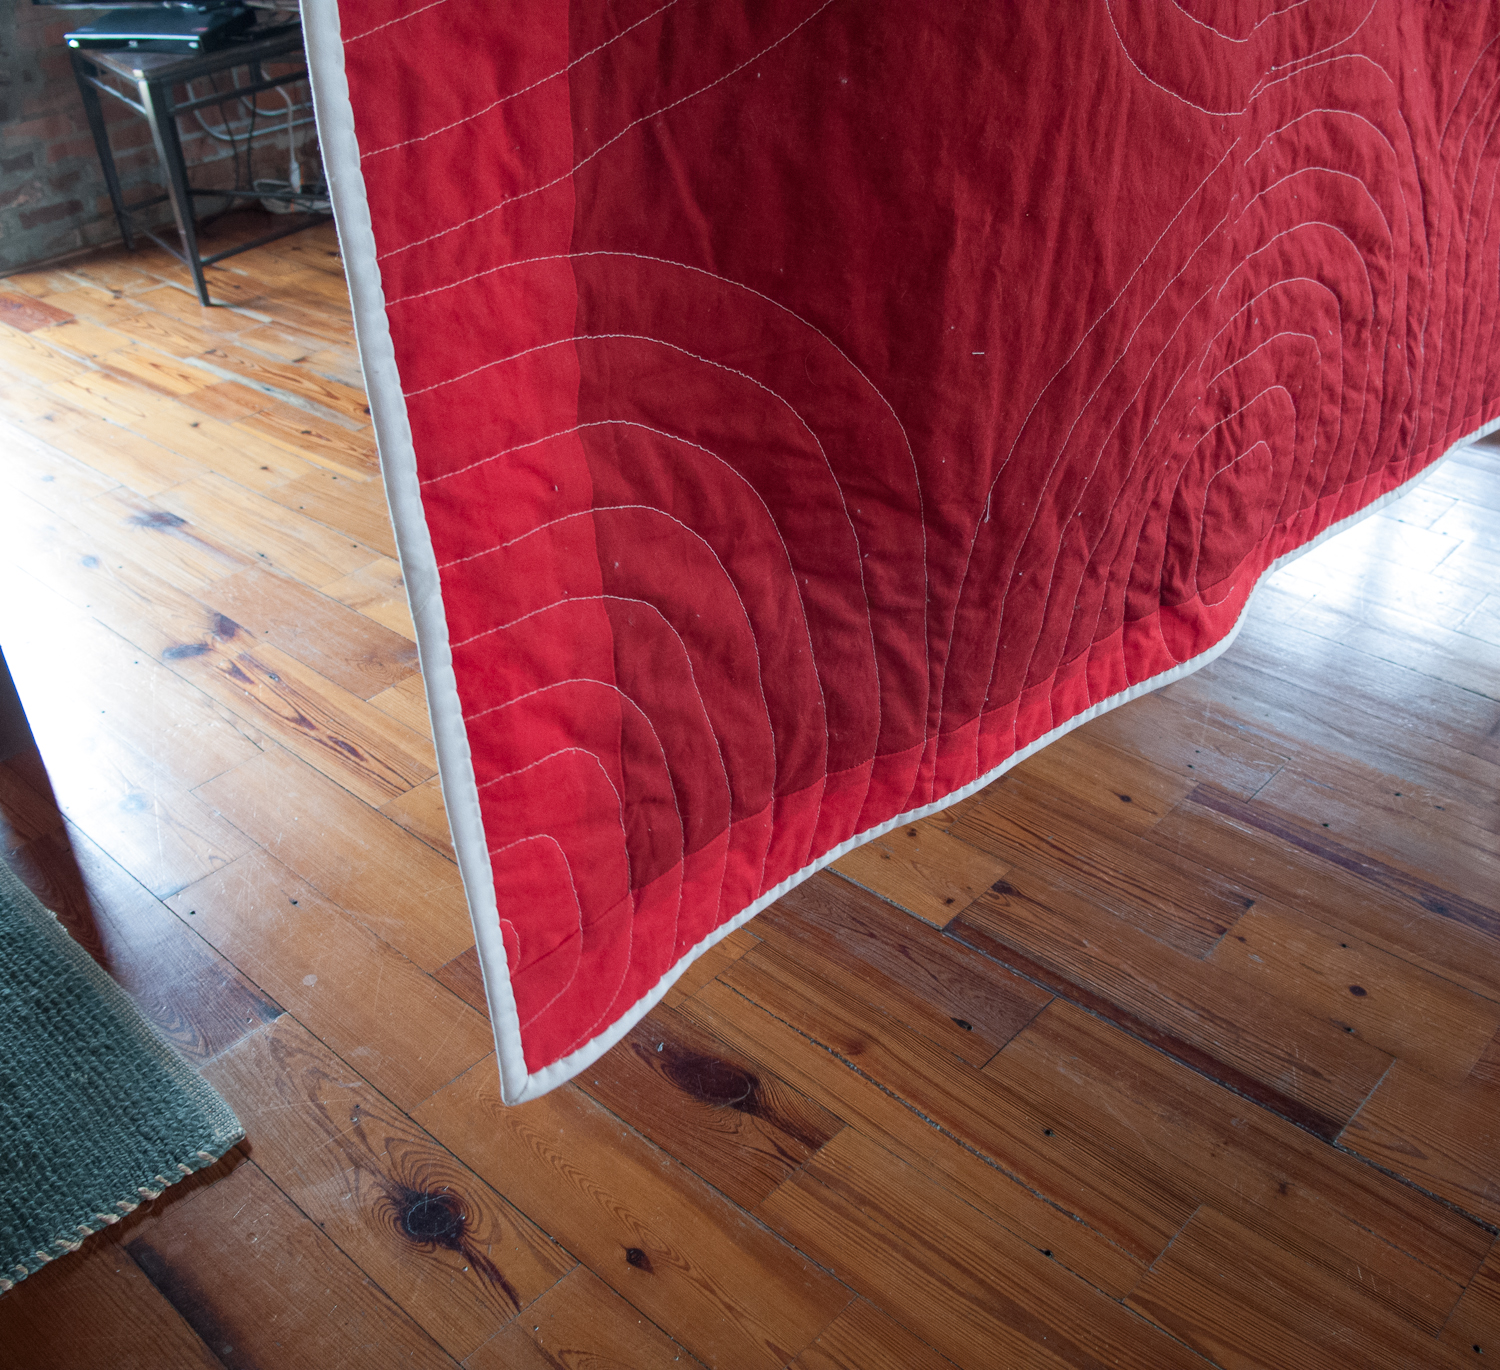
I used Snow again for the binding, after quite a bit of debate and discussion with Mom; we decided that the red outline on the front would compete too much with the circles. I actually like the white border on the red back far more than I was expecting. I thought it wouldn't be bold enough against the strong red, but it makes a lovely finishing edge; it's crisp.
And I came in under deadline by almost two months! Feels so good to check this project off the list, and I slept under it on my bed last night. I have finished a queen size quilt, and using a pattern for the design--which is highly unlike me--and my little $200 Huskystar sewing machine and I pulled this off together. Quite a feat. The final product is far beyond my expectations.
Finished with the quilting lines, here is the back and front with all those rough edges still there. I used my yoga mat as the straight line to square up the sides of the quilt, which was the most exciting step yet, because now the quilt actually looked like it was eventually going to be a quilt, rather than a big project with all its unfinished bits.

This little corner dangling off the couch was the first picture I took of one corner of a FINISHED quilt-- but that the time I took it, this little section was the only part with finished binding. I was just so excited I had to capture a finished part.
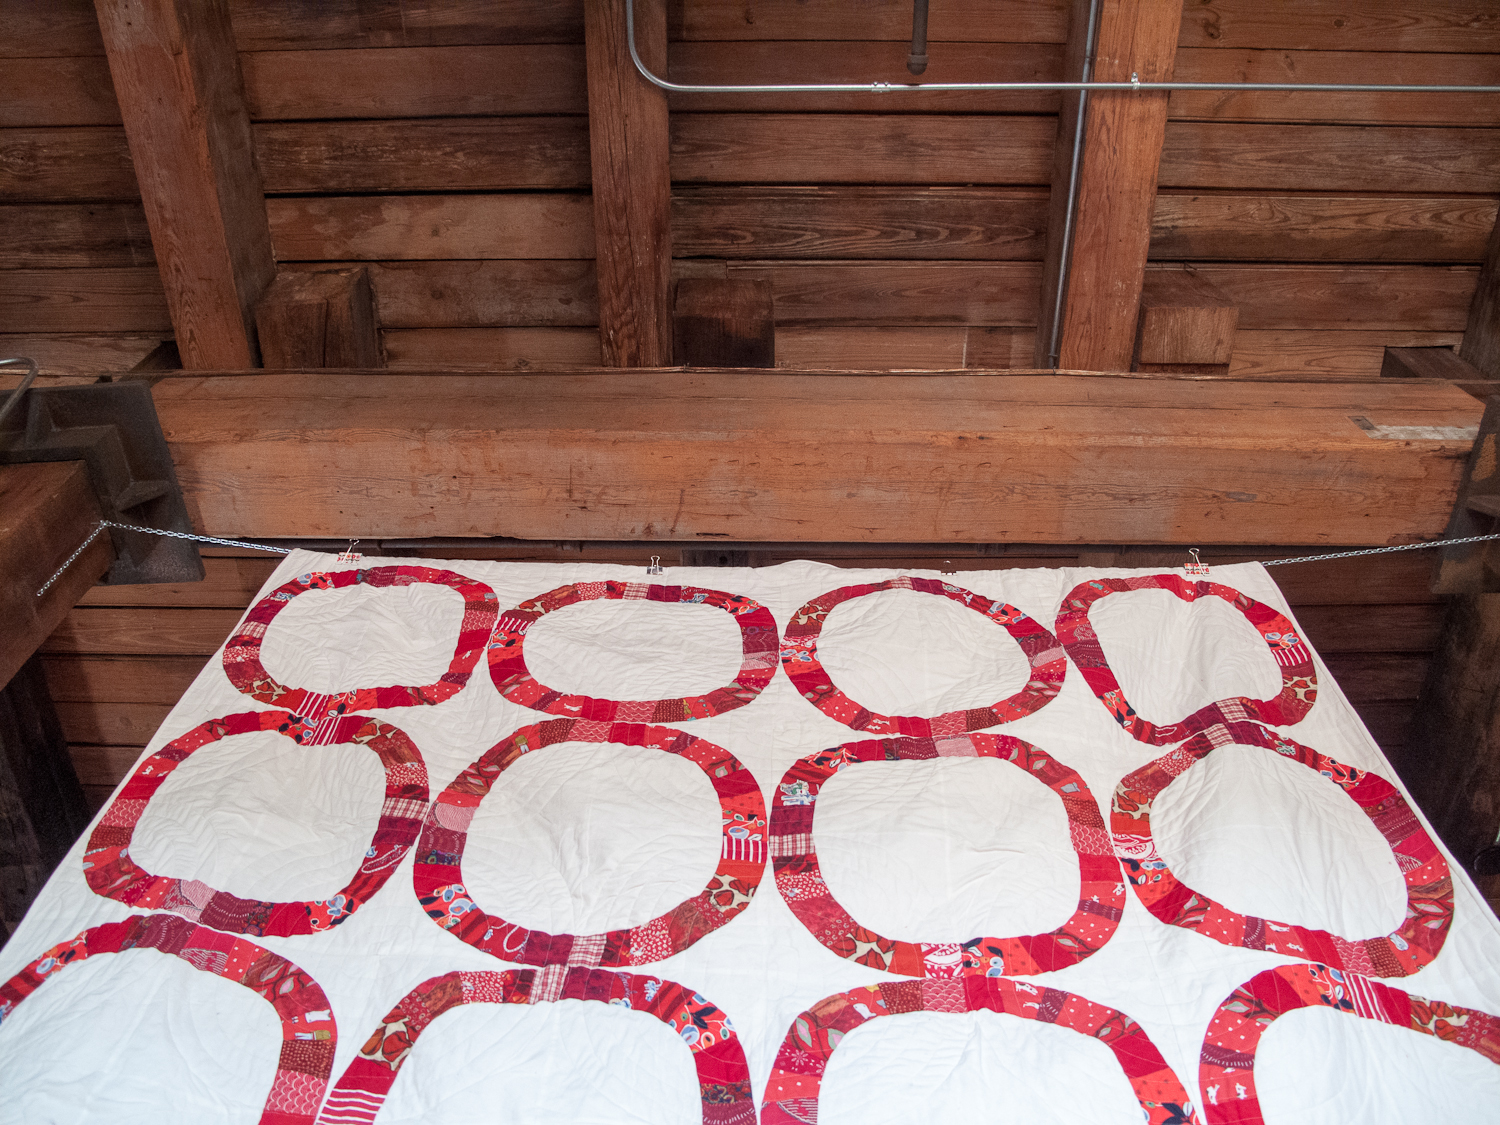
Finished, hanging.
Notice the stripe of Tomato running along the left and bottom - I had enough of Chinese Red, but wanted to infuse a little random bit of interest on the back. Also, that white-cream border is more beautiful than I could have imagined. I was not crazy about the idea when I was planning. But it turned out so crisp!

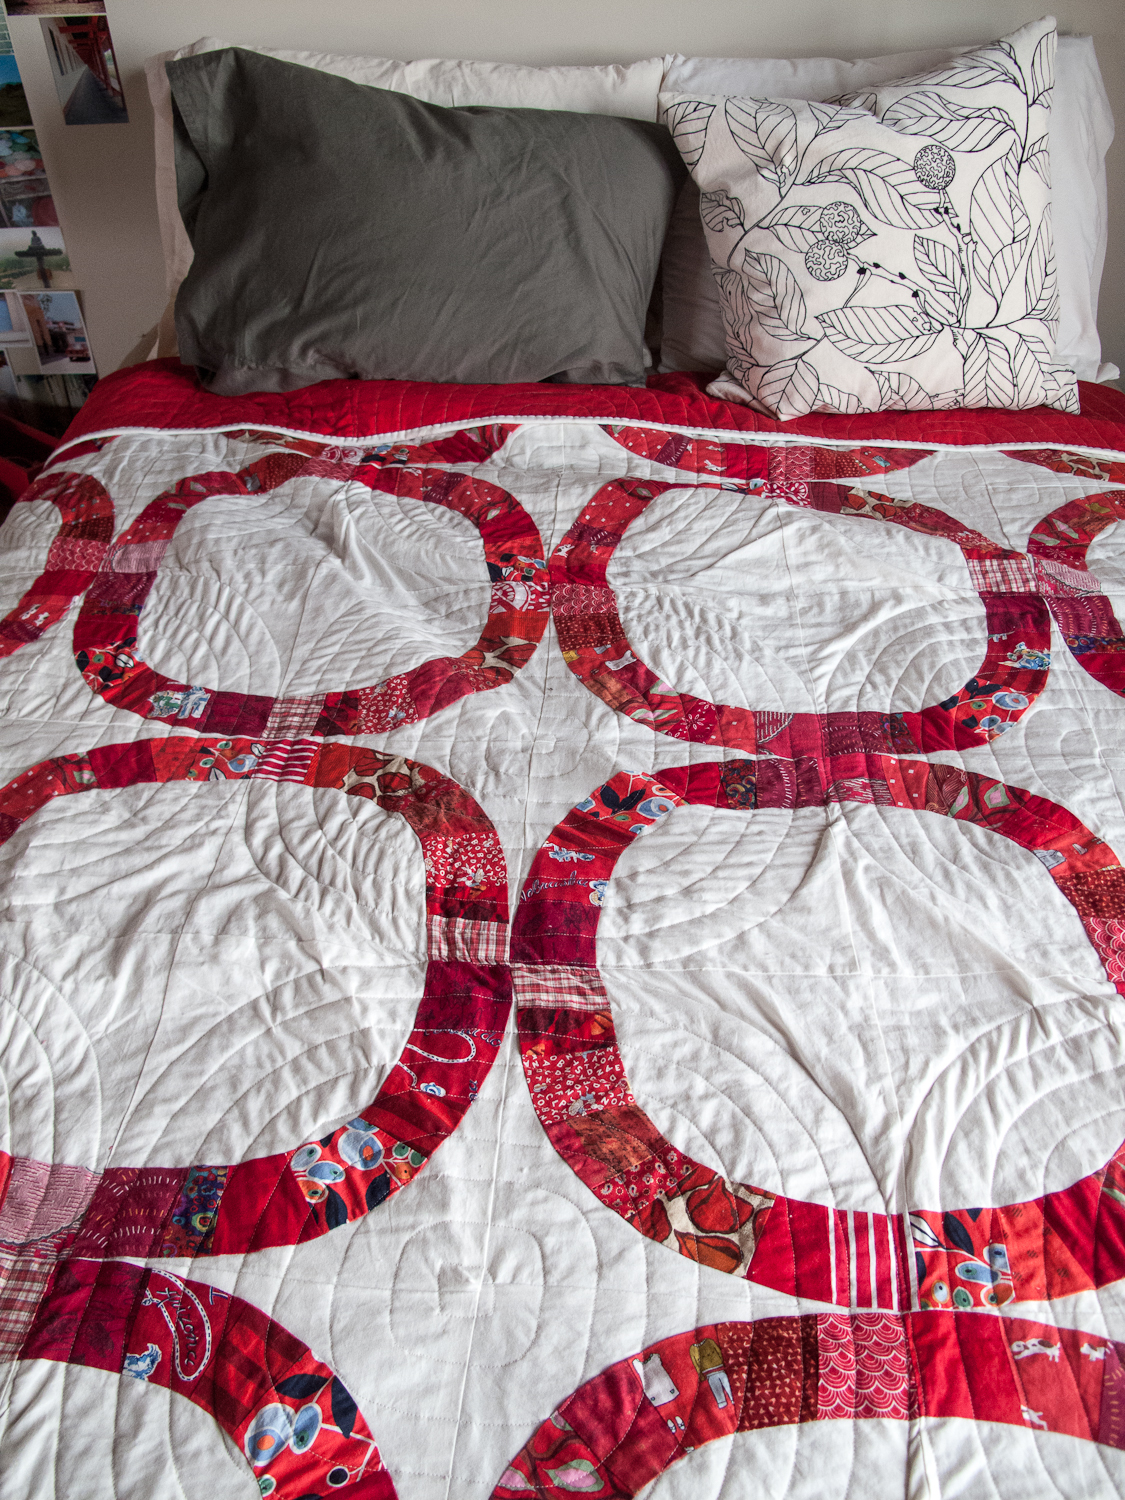
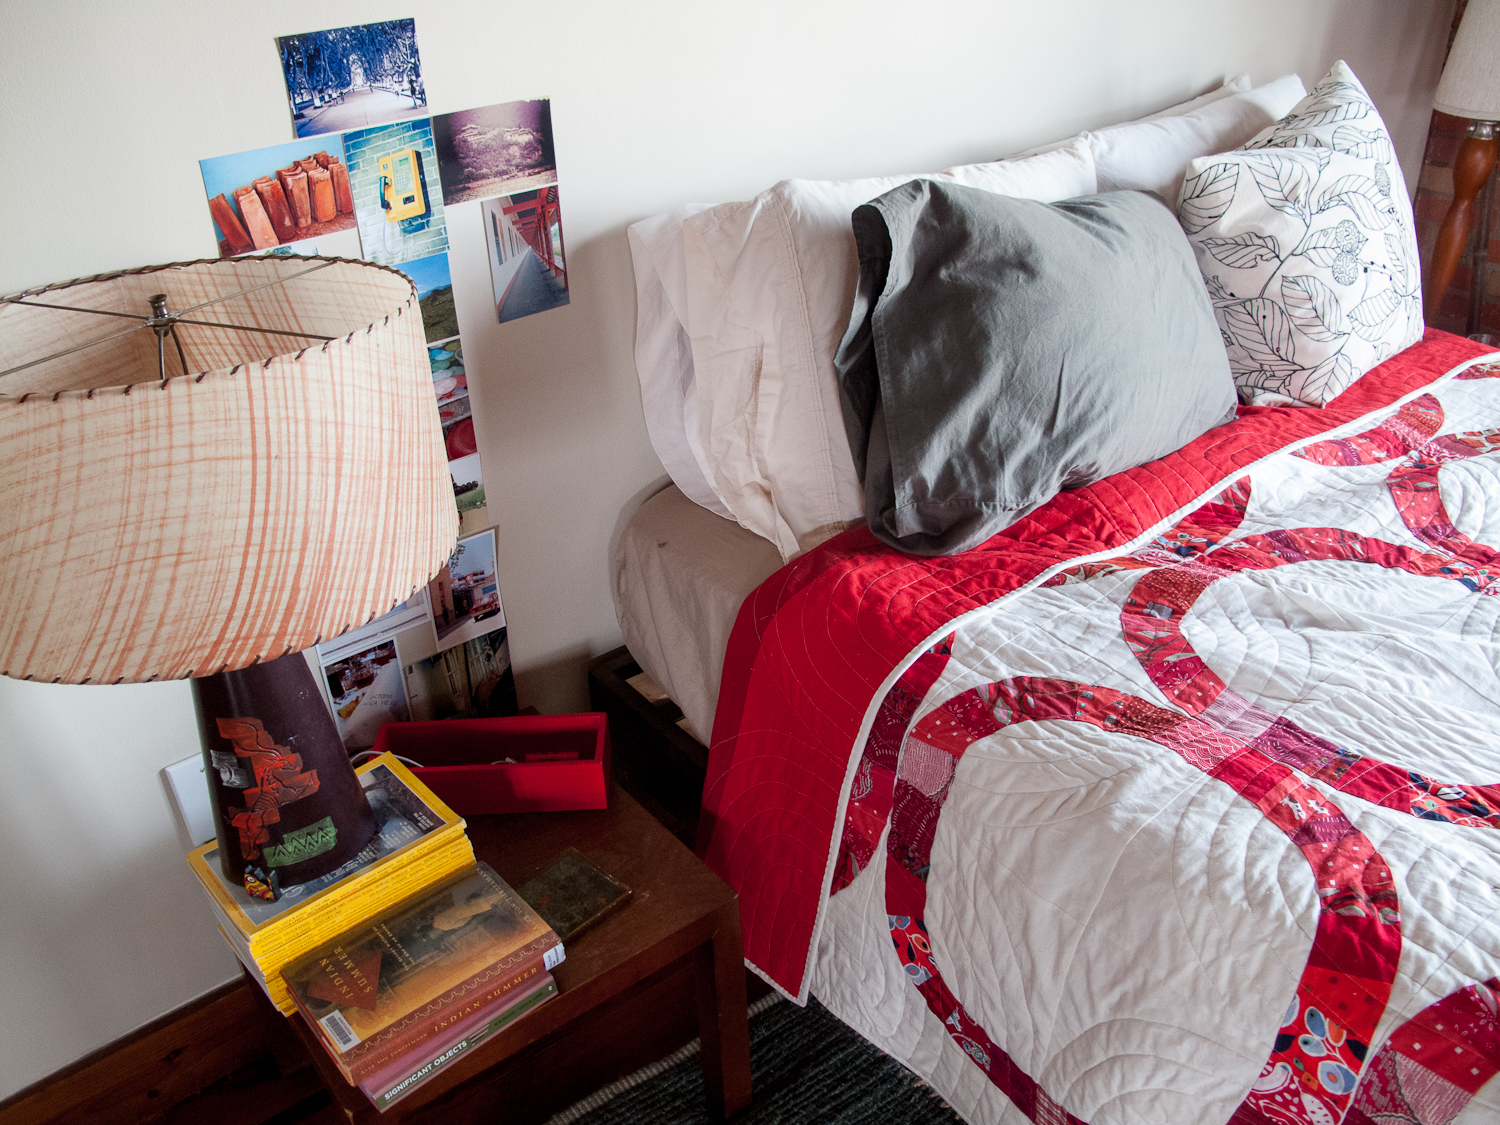
Its home as my bed quilt. I now have two quilts that I've poured my creative spirit and blood and hours into, that can cover my bed and provide beauty and joy to me daily. I am so happy to have found this craft and acquired these skills, and continue to expand them and learn more. I make plenty of mistakes, but it's so fun to get there, to make it to each milestone, and then to the end, and relish. My mom had no idea what she was getting me into (nor did I) when she bought me that sewing machine in 2009, to start and finish Ben's quilt.